


Dealing with hair splinters can be painful and frustrating, but with the right approach, you can safely remove them without causing additional irritation or skin damage. This is a comprehensive guide for safely extracting hair splinters.
Identifying and Understanding Hair Splinters

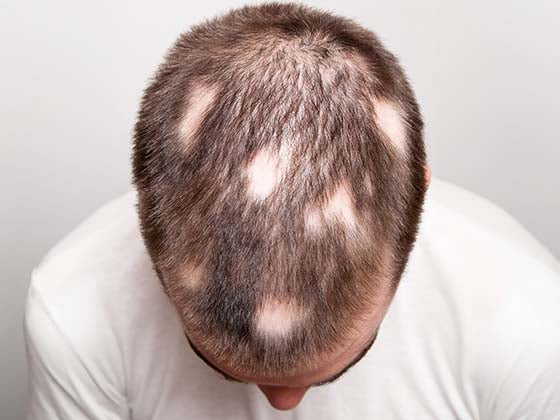
Hair splinters, also known as "trichonodosis," are formed when a strand of hair becomes embedded in the skin, causing irritation, pain, and inflammation. They are more common in people with coarse or curly hair but can affect anyone. Hair splinters are typically caused by loose hairs becoming trapped in fabrics such as clothing, bedding, or carpeting and piercing the skin upon contact or friction.
Identifying hair splinters:
-
Hair splinters can appear as small, dark or translucent specks embedded in the skin. They may be difficult to detect at first glance, particularly if they are deeply embedded.
-
Hair splinters are common on areas of the body with hair, such as the hands, feet, arms, legs, and buttocks. They can also appear on the scalp, especially when hair becomes trapped in combs, brushes, or hair accessories.
-
Hair splinters can cause pain, itching, irritation, or inflammation near the point of penetration. In some cases, they are accompanied by redness, swelling, or a raised bump.
Understanding hair splinters:
-
Hair splinters are composed of individual strands of hair that have broken off or become detached from the scalp or body. They can vary in length and thickness, depending on the type of hair and the circumstances surrounding their occurrence.
-
Hair splinters can occur when loose hairs become trapped in fabrics, such as clothing, bedding, or carpeting, and penetrate the skin upon contact or friction. They can also occur during activities that involve handling or grooming hair, such as brushing, combing, or styling.
-
Individuals with coarse or curly hair types are more prone to hair splinters due to the nature of their hair. Certain occupations or activities that involve frequent contact with fabrics or materials, such as healthcare workers, athletes, or individuals who work with textiles, may also be at increased risk.
-
While hair splinters are typically minor and resolve on their own with proper extraction, they can sometimes lead to complications such as infection if not removed promptly or if the area becomes inflamed or irritated. It's essential to handle hair splinters carefully to minimize the risk of complications.
The Anatomy of a Hair Splinter: What Makes It So Irritating?
The anatomy of a hair splinter involves several factors that contribute to its irritating nature:
-
Hair splinters consist of individual strands of hair that have broken off or become detached from the scalp or body. These strands can vary in length and thickness, but even small fragments can irritate when embedded in the skin.
-
The tip of a hair strand can be quite sharp, especially if it's broken off cleanly or has a tapered end. When a hair splinter penetrates the skin, its sharp tip can cause pain, discomfort, and irritation.
-
When a foreign object, such as a hair splinter, becomes embedded in the skin, the body's immune system may mount a response to remove it. This can lead to inflammation, redness, and swelling at the site of penetration, further exacerbating the irritation.
-
The location of a hair splinter can also affect its irritation level. Splinters in areas with frequent movement or pressure, such as the hands, feet, or joints, may be more uncomfortable than those in less mobile areas.
-
Friction between the hair splinter and the adjacent skin can exacerbate irritation and inflammation. Walking and gripping objects, for example, can cause discomfort due to repeated rubbing or pressure on the affected area.
-
If a hair splinter is not removed as soon as possible, or if the area becomes contaminated with dirt or bacteria, infection may occur. The presence of a foreign object in the skin can allow bacteria to enter, resulting in a localized infection and additional symptoms like pus, warmth, and tenderness.
Recognizing the Signs: When You Have a Hair Splinter
Recognizing the symptoms of a hair splinter is critical for timely treatment and relief. Pain or discomfort, a visible splinter, redness and swelling, itching or irritation, difficulty removing the object, and localized infection are some of the most common symptoms of a hair splinter. If you notice any of these signs or symptoms, especially if you suspect you have a hair splinter, you must take the necessary steps to safely remove it and avoid complications such as infection. If you are unsure how to remove the hair splinter or if you develop symptoms of infection, consult a healthcare professional.
Why Hair Splinters Happen: Common Causes and Prevention
Hair splinters, while seemingly minor, can occur for various reasons and can be very uncomfortable. Here are some common causes of hair splinters and how to avoid them:
-
Loose Hairs: Hairs shed from the scalp or body can become embedded in fabrics like clothing, bedding, towels, or carpet. When these fabrics come into contact with the skin, loose hairs can penetrate the skin's surface and become embedded, resulting in hair splinters. Prevention: To avoid loose hairs and debris, launder and clean clothes, bedding, and towels regularly. Consider using lint rollers or garment brushes to remove hair from fabrics before use.
-
Friction: Repeatedly rubbing up against fabrics or causing friction can make hair splinters more likely. This can involve using upholstered furniture, running or walking barefoot on carpeted floors, or dressing in rough or abrasive materials. Prevention: When participating in activities that could expose you to abrasive surfaces or friction, wear protective clothing or footwear. Consider using cushions or padding on furniture to reduce friction and minimize the risk of hair splinters.
-
Handling Hair: Handling or grooming hair can sometimes result in broken or detached strands that may become embedded in the skin. This can occur during activities such as brushing, combing, styling, or trimming hair. Prevention: Be gentle when handling or grooming hair to minimize breakage and shedding. Use appropriate tools and techniques for brushing, combing, and styling to prevent hair from becoming tangled or damaged.
-
Curly or Coarse Hair: Individuals with curly or coarse hair types may be more prone to hair splinters due to the nature of their hair. Curly or coarse hairs can easily become trapped in fabrics or materials and penetrate the skin upon contact. Prevention: Take extra care when handling or grooming curly or coarse hair to prevent breakage and shedding. Consider using protective styles or accessories to minimize friction and reduce the risk of hair splinters.
-
Environmental Factors: Environmental factors such as high humidity or static electricity can sometimes contribute to hair splinters by causing loose hairs to cling to surfaces or fabrics. Prevention: Maintain a clean and dry environment to reduce the accumulation of loose hairs and debris. To reduce static electricity and stop hairs from sticking, think about applying anti-static sprays or treatments on textiles.
-
Occupational Hazards: People in certain professions or activities, like healthcare providers, athletes, or those who work with textiles, who frequently come into contact with fabrics or materials, may be more susceptible to hair splinters. Prevention: Wear appropriate protective gear or clothing to minimize contact with fabrics or materials that may harbor loose hairs. Take regular breaks to stretch and move around to reduce the risk of prolonged friction or contact.
The Safe Removal of Hair Splinters: Tools and Techniques
To minimize discomfort and reduce the risk of infection, it is necessary to use the proper tools and techniques when removing hair splinters. Here are some ways to safely remove hair splinters:
-
Before attempting to remove the hair splinter, thoroughly clean the affected area with soap and water to reduce the risk of infection. To disinfect the area, apply a mild antiseptic solution.
-
Examine the hair splinter with a magnifying glass to determine its size, depth, and location. This will help you decide on the best removal strategy.
-
Sterilize the tools you intend to use to remove the hair splinter, such as tweezers or needles, by cleaning them with rubbing alcohol or boiling them in water for several minutes. This helps prevent infection and keeps the tools clean and safe to use.
-
If the hair splinter protrudes from the skin's surface, use clean, fine-tipped tweezers to firmly grasp the end of the splinter and gently pull it out in the direction of hair growth. Squeezing or digging into the skin can aggravate the irritation or cause injury.
-
After removing the hair splinter, thoroughly clean the area with soap and water to eliminate any remaining debris or bacteria. You can apply a mild antiseptic or antibiotic ointment to the area to prevent infection and promote healing.
-
If the hair splinter is deeply embedded or difficult to remove, you can soak the affected area in warm water for a few minutes to soften the skin and hair. This may help loosen the splinter and make it easier to extract.
-
If you're unable to remove the hair splinter yourself or if you experience signs of infection, such as increased redness, swelling, warmth, or pus, seek medical attention from a healthcare professional. They can safely remove the splinter and provide appropriate treatment for any complications.
-
Avoid using home remedies such as tape, glue, or adhesive bandages to remove hair splinters, as these methods can be ineffective and may cause further irritation or damage to the skin.
Sterilization First: Preparing Your Tools for Safe Removal
"Sterilisation First" is an important mantra when preparing tools for safe removal. Whether you work in a medical, laboratory, or culinary setting, ensuring that your tools are properly sterilized is critical for avoiding infection, contamination, and other negative outcomes. Here's a basic guide to getting your tools ready for safe removal:
-
Collect all of the tools you will need for the procedure. Make sure you have everything you need before you begin.
-
Before sterilizing the tools, thoroughly clean them to remove any visible debris, dirt, or organic matter. Use soap and water, brushes, or specialized cleaning products as needed.
-
There are several ways to sterilize tools, including autoclaving, chemical sterilization, dry heat sterilization, and ethylene oxide gas sterilization. Choose the method that is best suited to the tools and materials you are working with.
-
If you're using an autoclave, make sure to place the tools in sterilization pouches or containers designed for autoclaving. Follow the manufacturer's instructions for loading the autoclave and setting the appropriate parameters.
-
For chemical sterilization, immerse the tools in a sterilizing solution such as glutaraldehyde or hydrogen peroxide. Follow the manufacturer's instructions for the concentration of the solution and the duration of exposure.
-
If you're using dry heat sterilization, place the tools in an oven or dry heat sterilizer set to the appropriate temperature and time recommended for sterilization.
-
Ethylene oxide gas sterilization requires specialized equipment and facilities. Follow the manufacturer's instructions for loading the sterilization chamber and operating the equipment safely.
-
During the sterilization process, monitor the temperature, pressure, or exposure time to ensure that the tools are properly sterilized. Use chemical or biological indicators as needed to confirm sterilization.
-
Once sterilized, store the tools in clean, dry containers or pouches until ready to use. To avoid contamination, do not touch sterilized surfaces with your bare hands.
-
Inspect and maintain your sterilization equipment regularly to ensure proper operation. Perform quality control tests and document the sterilization process to ensure that your procedures are compliant with regulations and safe.
By following these steps and prioritizing sterilization, you can help ensure the safety and efficacy of your procedures while also protecting yourself and your patients or clients from infection and contamination.
A Gentle Touch: Step-by-Step Removal Process
A gentle touch is required during the step-by-step removal process, especially when dealing with delicate or sensitive materials. Whether you're removing medical dressings, adhesive bandages, or any other type of covering, here's a simple step-by-step guide: prepare the environment, communicate with the individual, inspect the dressing or bandage, gather necessary supplies, assess adherence, begin slowly, use adhesive remover if necessary, support the skin, inspect the wound, dispose of waste properly, and document the procedure. Following these gentle steps will ensure a comfortable and safe removal process for both you and the person receiving care. Taking your time and handling the procedure with care can help to alleviate pain, reduce the risk of complications, and promote healing.
Aftercare Essentials: Preventing Infection and Promoting Healing
Aftercare is essential for preventing infection and promoting healing following any procedure that involves wound care or medical intervention. Here's a guide to the essential aftercare steps.
-
Before touching the wound or performing any aftercare procedures, thoroughly wash your hands with soap and water or use hand sanitizer to reduce the risk of introducing harmful bacteria.
-
Check the wound for signs of infection, such as redness, swelling, warmth, or drainage. If you notice any concerning symptoms, consult a healthcare professional for further evaluation.
-
Follow any specific instructions given by your healthcare provider for wound care, medication administration, and activity restrictions. To maximize healing and avoid complications, carefully follow these instructions.
-
Clean the wound regularly with mild soap and water, or as directed by your healthcare provider. Gently remove any debris or crust accumulated around the wound, being careful not to disturb the healing tissue.
-
If your wound requires a dressing, follow your healthcare provider's instructions. Change the dressing regularly to keep the wound clean and heal properly. Use sterile techniques when handling dressings to prevent contamination.
-
Monitor the wound for signs of infection, such as increased redness, swelling, pain, or pus-like drainage. If you suspect an infection, contact your healthcare provider immediately for evaluation and treatment.
-
If you are in pain or discomfort, take over-the-counter pain relievers as prescribed by your healthcare provider. Follow the dosing instructions carefully and avoid exceeding the recommended dosage.
-
Avoid activities that increase the risk of injury or contamination of the wound. Cover the wound with a clean dressing or bandage, if necessary, and wear protective clothing or gear to avoid further injury.
-
Maintaining a healthy lifestyle helps the body's natural healing process. Consume a well-balanced diet high in vitamins and nutrients, stay hydrated, get plenty of rest, and avoid smoking and excessive alcohol consumption, which can impair healing.
-
Attend any follow-up appointments with your healthcare provider to track the progress of your recovery and address any concerns or complications that may arise.
-
If you are experiencing persistent pain, worsening symptoms, or signs of infection, seek medical attention right away. Delaying treatment for complications can lead to more serious issues and prolonged healing time.
By following these aftercare guidelines, you can help prevent infection, reduce complications, and support the body's natural healing process for a full recovery. Always consult with your healthcare provider for tailored advice and recommendations based on your specific needs and circumstances.
When to Seek Professional Help: Recognizing Complications
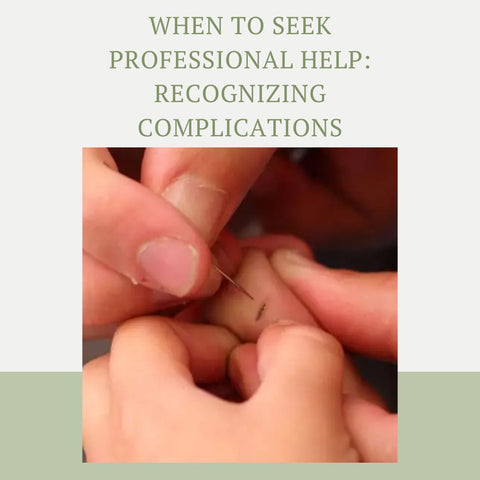
Recognizing complications early is critical for timely intervention and optimal healing. Here are some signs that it is time to seek professional help:
-
If the pain or discomfort at the wound site worsens, especially if it is severe or does not respond to over-the-counter pain medication, it may indicate an underlying problem that needs to be addressed.
-
While some redness and swelling are normal during the early stages of healing, persistent or worsening redness and swelling, particularly if it spreads beyond the wound's immediate area, may indicate an infection or other complications.
-
A fever, especially if accompanied by chills or sweats, may indicate an infection. Fever is the body's natural response to infection, so seek medical attention if you develop one after a procedure or injury.
-
If you notice an increase in the amount, color, or odor of drainage from the wound, this could indicate an infection or poor healing. Pus-like or foul-smelling drainage is especially concerning and should lead you to seek medical attention.
-
If the wound does not improve or heal within the expected timeframe, it could be due to an underlying issue such as poor blood flow, compromised immune function, or other factors that need to be evaluated by a healthcare professional.
-
Pay close attention to any changes in the wound's appearance, such as the formation of new sores, blisters, or necrosis (dead tissue). These changes could indicate complications like pressure ulcers or tissue damage.
-
Nausea or vomiting, especially when accompanied by other symptoms such as abdominal pain or diarrhea, may indicate systemic infection or other serious complications that require medical attention.
-
A foul or unpleasant odor emanating from the wound may indicate the presence of bacteria or other pathogens, suggesting infection or necrotic tissue that needs to be addressed by a healthcare professional.
-
If you experience difficulty moving or using the affected area, it may indicate complications such as muscle or nerve damage, joint stiffness, or impaired circulation that require evaluation and intervention.
-
While minor oozing or spotting is common during the initial stages of wound healing, persistent or excessive bleeding that does not stop with direct pressure may indicate a more serious issue that requires medical attention.
If you experience any of these signs or symptoms, it's important to seek prompt medical attention from a healthcare professional. Delaying treatment for complications can lead to more serious issues and prolonged healing time.
Signs of Infection: When a Hair Splinter Becomes a Bigger Problem
Hair splinters, while seemingly minor, can lead to infections if not treated properly. Here are signs that a hair splinter may have become infected and requires medical attention:
-
While a hair splinter may initially cause minor discomfort, persistent or worsening pain, especially if it becomes throbbing or sharp, can indicate an infection.
-
If the area around the hair splinter becomes increasingly red, swollen, or warm to the touch, it may be a sign of inflammation and infection. Pay close attention to any changes in the appearance of the skin.
-
The presence of pus, a yellowish or greenish fluid, around the site of the hair splinter suggests an infection. Pus is a sign that the body is trying to fight off bacteria or other pathogens.
-
A fever, particularly if it develops after experiencing a hair splinter, can indicate a systemic infection. Fever is the body's natural response to infection and inflammation.
-
If the area around the hair splinter becomes increasingly tender or painful to the touch, it may indicate anunderlying infection that requires medical attention.
-
Red streaks extending from the site of the hair splinter towards the rest of the body can be a sign of lymphangitis, a serious infection of the lymphatic vessels. Seek medical attention immediately if you notice red streaks.
-
If you develop swollen lymph nodes near the site of the hair splinter, it may indicate that your body is mounting an immune response to an infection. Swollen lymph nodes are a sign that your body is fighting off an infection.
-
If the infection spreads or causes inflammation in nearby tissues, you may experience difficulty moving or using the affected area. This can be a sign that the infection is becoming more severe and requires medical intervention.
If you experience any of these signs or symptoms after getting a hair splinter, it's important to seek medical attention promptly. Infections can worsen quickly if left untreated, so don't hesitate to contact a healthcare professional for evaluation and treatment.
Professional Removal: When to See a Doctor for Your Hair Splinter
While many hair splinters can be safely removed at home, in some cases, seeing a medical professional is the best option. If you have a hair splinter, the following symptoms indicate that you should see a doctor: difficulty removing the splinter, signs of infection, pain or discomfort persisting after removal, the presence of multiple splinters or complications, underlying medical conditions, a history of allergic reactions or sensitivity, and difficulty functioning. If you notice any of these symptoms or circumstances, make an appointment with a healthcare professional, such as a primary care physician, dermatologist, or urgent care provider, for an evaluation and proper treatment of your hair splinter. They can assess the situation, administer the appropriate treatment, and ensure your safety and well-being.
Long-Term Strategies: Avoiding Future Hair Splinters
To avoid future hair splinters, take proactive steps to reduce exposure to potential sources of splinters and protect yourself from injury. Long-term strategies for avoiding hair splinters include wearing protective clothing, using personal protective equipment (PPE), keeping work areas clean, handling materials carefully, trimming loose hairs, inspecting tools and equipment, practicing safe handling techniques, educating yourself and others, and seeking professional help when necessary. By incorporating these long-term strategies into your daily routine, you can reduce the risk of hair splinters while also protecting yourself from potential injury and discomfort. Prevention is essential for maintaining a safe and healthy work environment and home environment.
Beyond the Splinter: Maintaining Healthy, Splinter-Free Skin
Maintaining healthy, splinter-free skin entails following a thorough skincare routine and engaging in habits that promote skin health and integrity. Keep your skin hydrated, protect it from UV damage, cleanse gently, exfoliate regularly, moisturize daily, protect against environmental irritants, eat a healthy diet, get enough sleep, manage stress, and seek professional advice. By incorporating these tips into your daily routine, you can help keep your skin healthy and radiant, making it less prone to splinters, irritation, and inflammation. Consistency and patience are essential for maintaining long-term skin health and vitality.